
As per the class rules there are certain modifications that are allowed to be made to your boat. They are mainly to increase the reliability of your boat rather than enhance it’s performance.
This page contains details of those modifications that can be made. As there have now been several batches of boats with each batch showing improvements in quality the page will be divided into several sections for the different aged boats. Some of the mods that are mentioned have now been rectified at source and are no longer needed so it is best to read through the whole document before starting any modification programme!
Hopefully the information will be a useful resource for owners, and remember, if it appears on this page it is a class legal mod!
Joysway as the manufacturer of the DF65 have run production of the boat for more than one year, over this time there have been only a few quality issues the majority of which have now been addressed and rectified by Joysway themselves.
This page has been categorised into five sections, the first is for packaging and radio issues, the second is for mods that should be done to all boats during the build process, the third is for older boats the fourth section is for newer boats and the final section is for rigging. If you have any other questions please use the contact form on the contact page.
Section 1 – Packaging & Radio
Packaging – The packaging of early boats differs to the packaging we now see. Some people have struggled to find the stand, which in all packages is under the polystyrene packaging. In early packages the booms, mast sections, fin and rudder were all on the top side of the polystyrene, later packages (January 14 onwards) have these items packed under the polystyrene along with the stand. Basically when you unpack your boat make sure you remove all of the cardboard box to get to everything.
Radio Sets – Some of the early radio sets were not keeping their bind between tx and rx and there was suggestion that the range was not very good. The newer J4C12R receiver has no binding problems, however some people are still reporting range issues. Our suggestion is to use full fat Duracell type batteries in the tx and make sure it is held flat when using it. If your rx aerial is not held in an O ring on one of the servo tray legs it is worth making sure that it is held up high under the deck. Of course for those of you who have swapped out your tx and rx this isn’t a problem and you should follow your specific manufacturers installation instructions.
If you follow this simple rule you shouldn’t lose the bind between rx and tx – ALWAYS switch on the tx then the boat, then move the sheeting control up and down and the flashing green lights should go solid and you’ll be in control!
ALWAYS switch off the boat then the tx.
End point adjustment devices – If you are using the supplied radio set there is no facility to set or adjust the end points for the sheet travel. If you have swapped out you tx and rx then you’ll probably have this facility. To make life fair on those that don’t have a fancy radio set you can put an EPA device in the boat. It is up to you to find a suitable device.
Section 2 – Mods that should be done to ALL boats during the build process.
Stiff Rudder – When the rudder is inserted during the kit build please take care that it moves freely. Some people have put their boats on the water only to find that when they steer the rudder will bind and stick in its turned position.
Not a huge issue to sort when building, just run a 3.1mm drill through the rudder tube and hey presto, job sorted!
Deck Eye Mods – There are a few mods in this area that will make your boat better and more reliable so that it is ready for all that you, and the weather, can throw at it.
One thing that should be done to all the deck eyes is to unscrew them, mix up some of your favourite 5 minute epoxy put a drop or two in each deck eye dimple and screw the deck eyes back in to place. Not only does this seal the eye it also gives it a bit more strength.
Using the numbering system from the instruction booklet at the bottom of page 7 I’ll talk you though the the mods required. Deckeye 1 is fine and anchors the sheeting elastic and doesn’t need any modding particularly other than the above epoxy treatment.
Deckeye 2 is used as the jib swivel anchor and doesn’t need any modding. Deckeye 3 must be left in place, the three rigs use the same length jib boom so the swivel point stays the same. Deckeye 4 can be unscrewed and cut to make a hook and wound back in (with some epoxy!) so that the open part of the hook is aftmost. A picture says a thousand words so here is one!
This mod allows the rig to be removed easily whereas the instruction manual suggests using deckeye 1 as the swivel anchor point which makes rig removal tricky.
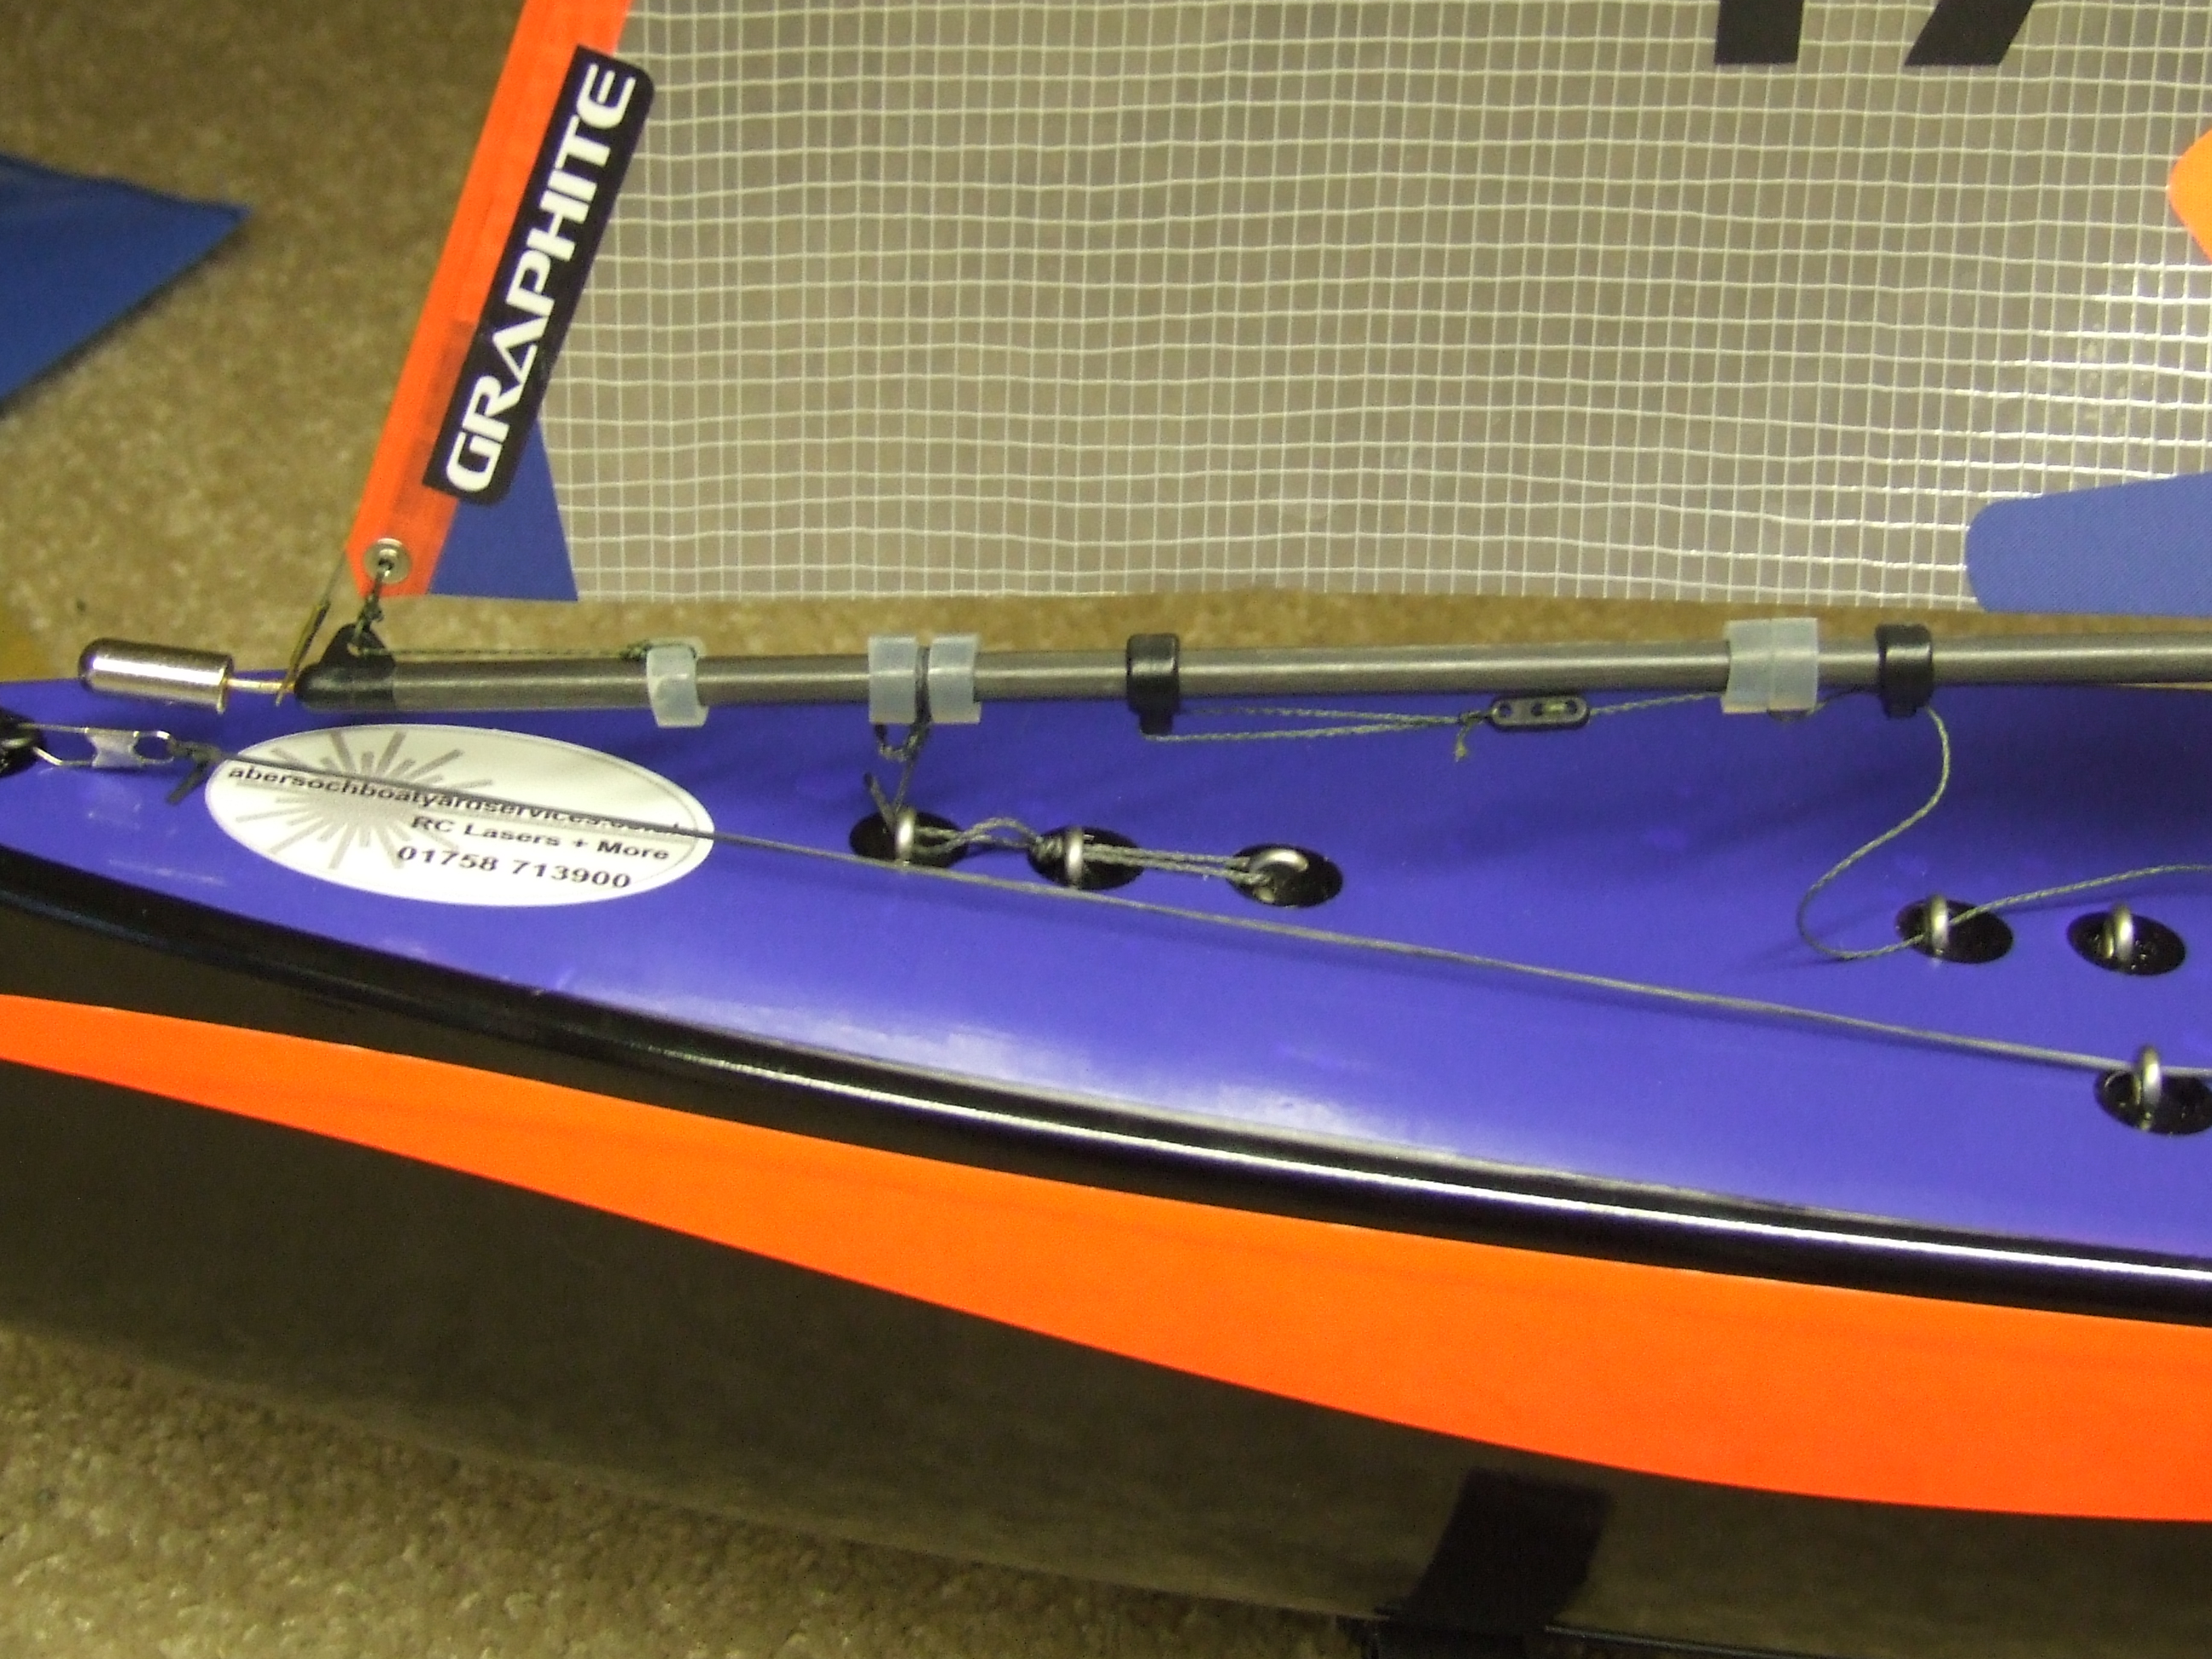
Deckeye 5 is used for the jib sheet lead with the instructions suggesting that deckeye 7 should be part of the sheet lead. Personally this seems like an odd lead and I have led the jibsheet straight from 5 to 8 which seems more logical. Picture below.
There are two other deckeyes that hold the mainsheet bridle, these eyes are subject to a large amount of force which gybing in heavy weather and deserve a little more than the basic epoxy treatment. When you have completed the basic treatment it is worth mixing a little more epoxy and dropping some into the two dimples around the eyes, you won’t need much but it is well worth doing. Another picture below.
Pulley Block & Backstay Hook – Whilst you have some epoxy mixed up it is worth unscrewing both of these items and winding the screws back in with some of the epoxy, that way you have eliminated the possibility of a leak in these areas. Whilst the backstay loop is off the boat it pays to open out the loop into a hook for ease of rig changes.
Servo Tray – The servo tray in all boats to date are made from plywood, if the main hatch patch is left in place and the servo tray is untreated you may find that it starts to delaminate which isn’t too clever. The simple way to fix this is to remove the servo tray, varnish and refit it. It sounds simple and it really is.
Switch – Whilst the servo tray is out of the boat being varnished it is worth giving the switch a little attention. Undo the screws and remove both the switch and the cover then refit the cover after smearing either some Vaseline or sealant around the top of the cover surface that mates with the underside of the deck, then refit the switch and tighten up the screws. This should provide a good long lasting waterproof seal. You may also change the switch if you like but it must fit in the same location as the original without any modification
Battery Mod – Although you have been supplied with a 4 cell battery box which will quite happily cope with your sailing needs there is another option! The deck opening next to the mast step can be used to put a battery pack of your choice. I have gone for a 4 cell AAA pack, which is cheap and cheerful and seems to do the job. The only thing you will need to do this job, other than the pack itself, is an extension lead and some velcro which are available from the internet for very little money.
Section 3 – Modifications that should be done to boats manufactured between May and July 2013
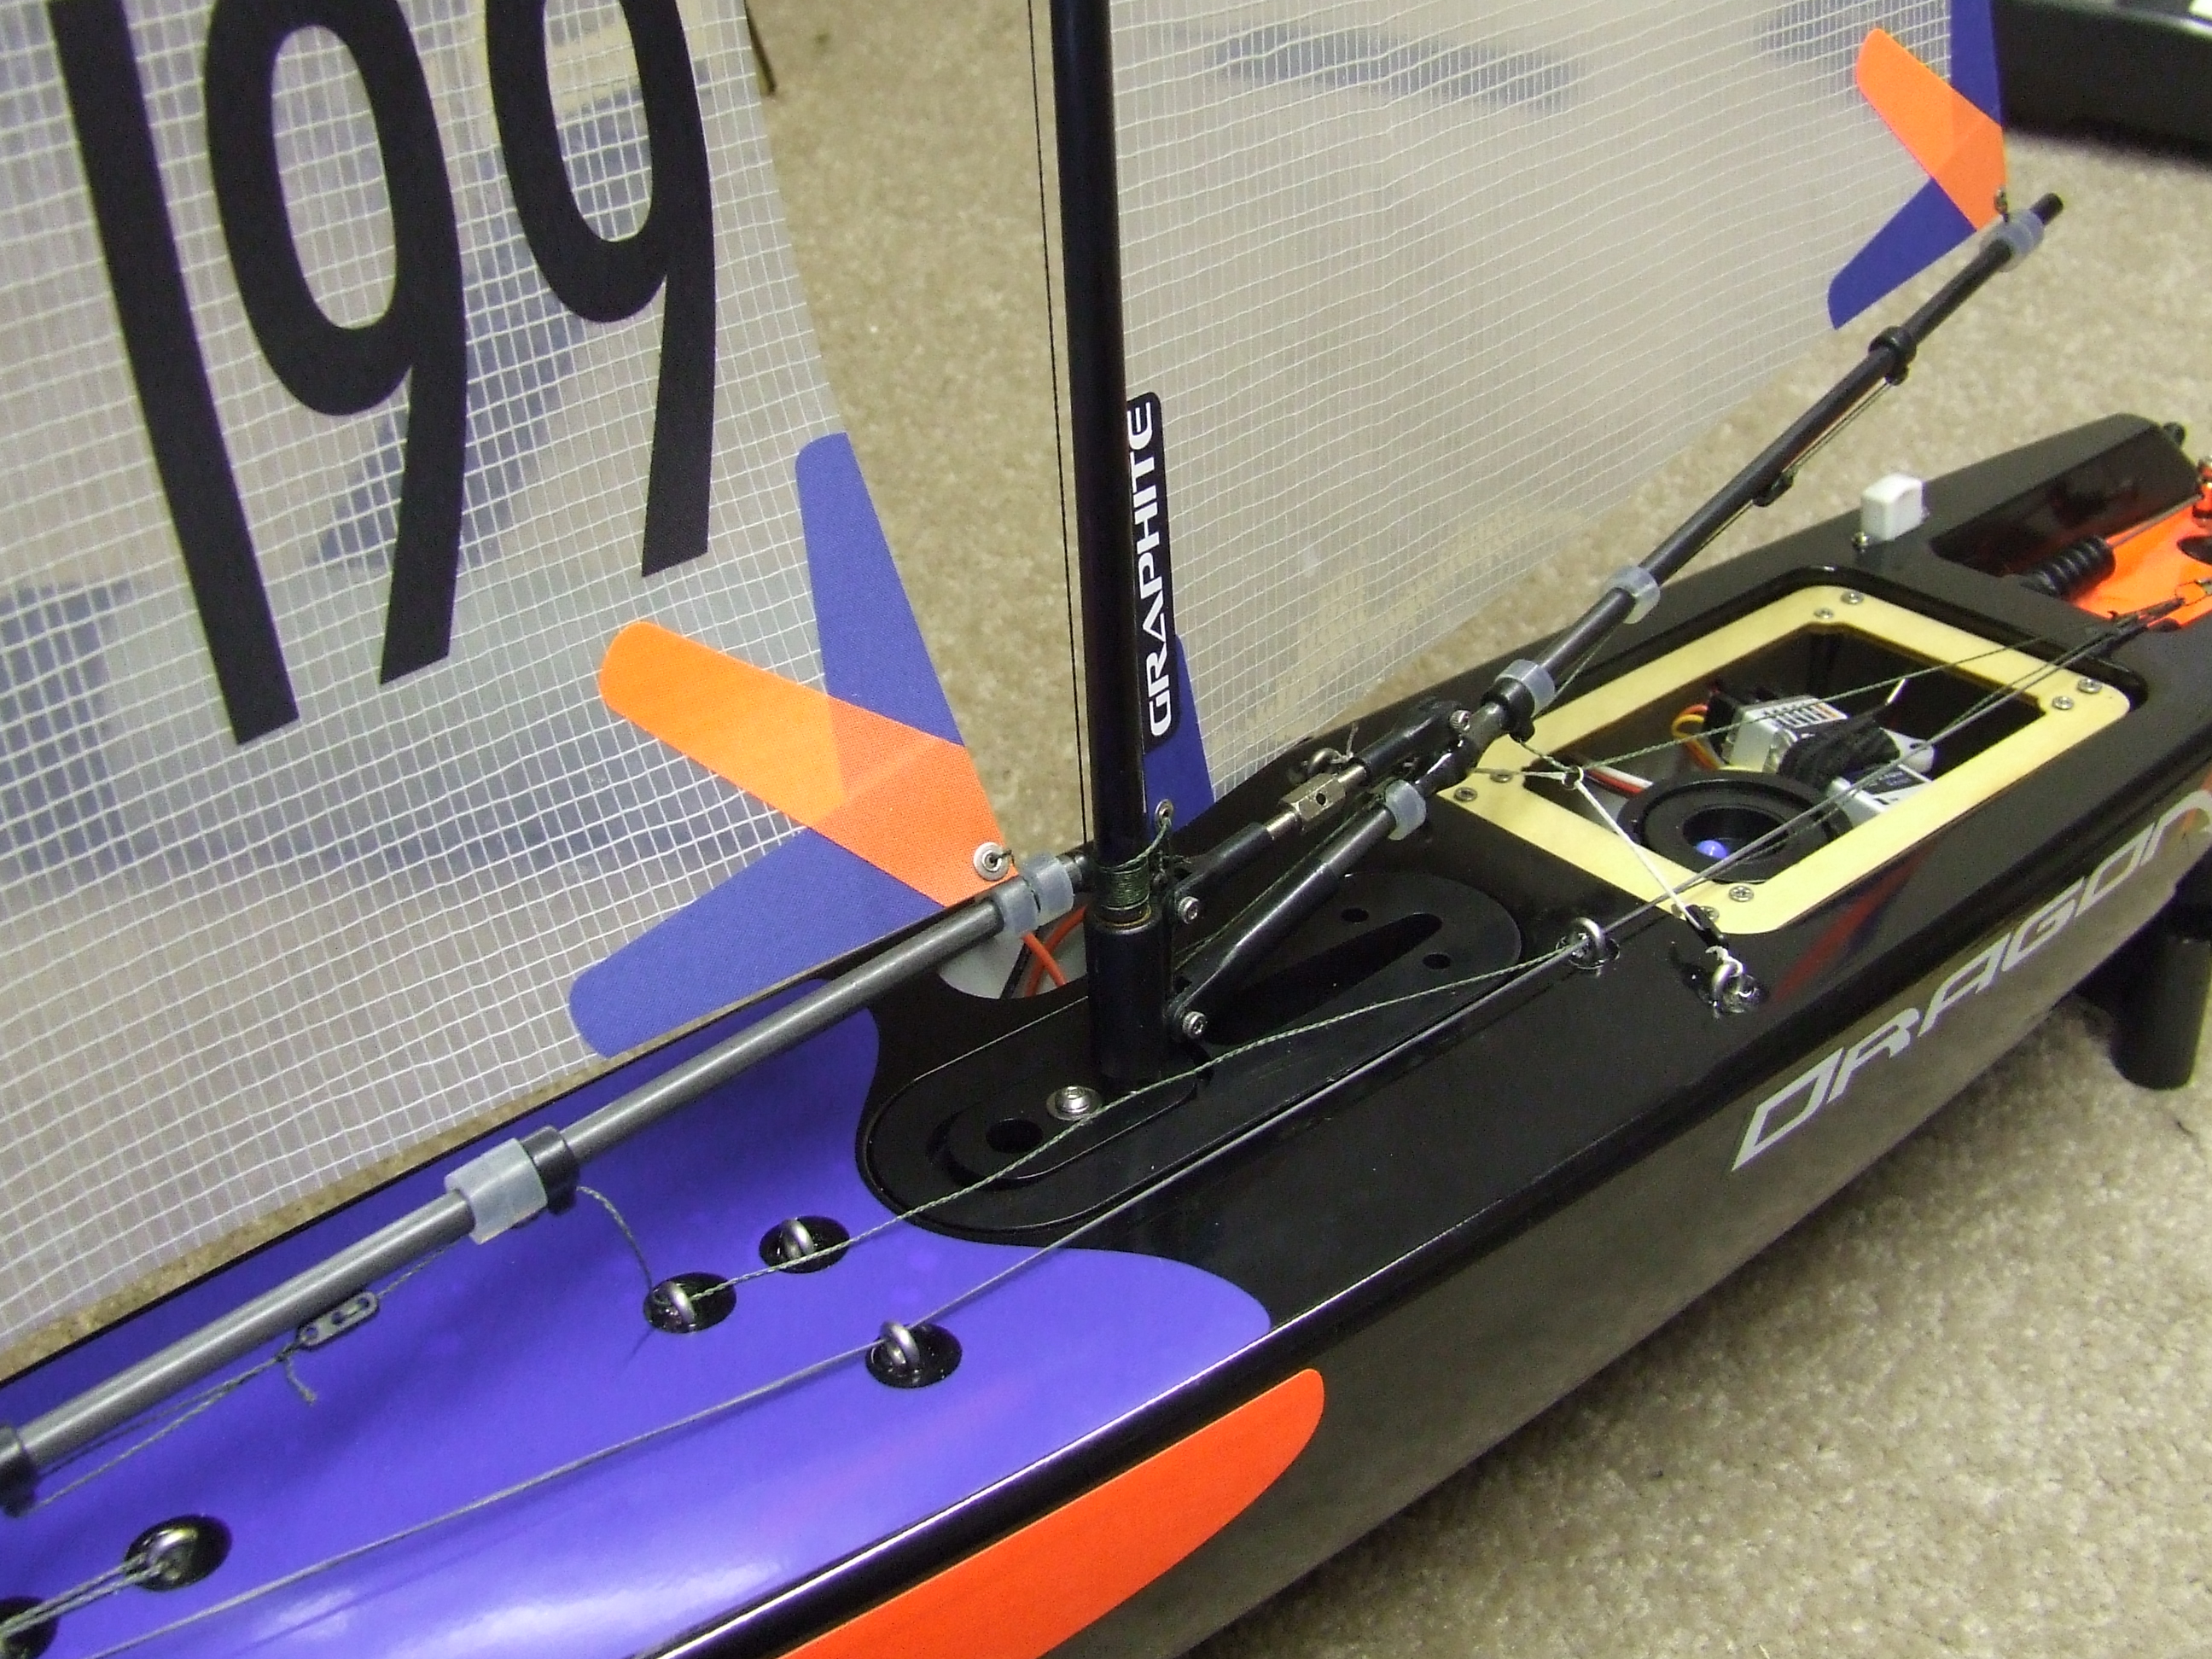
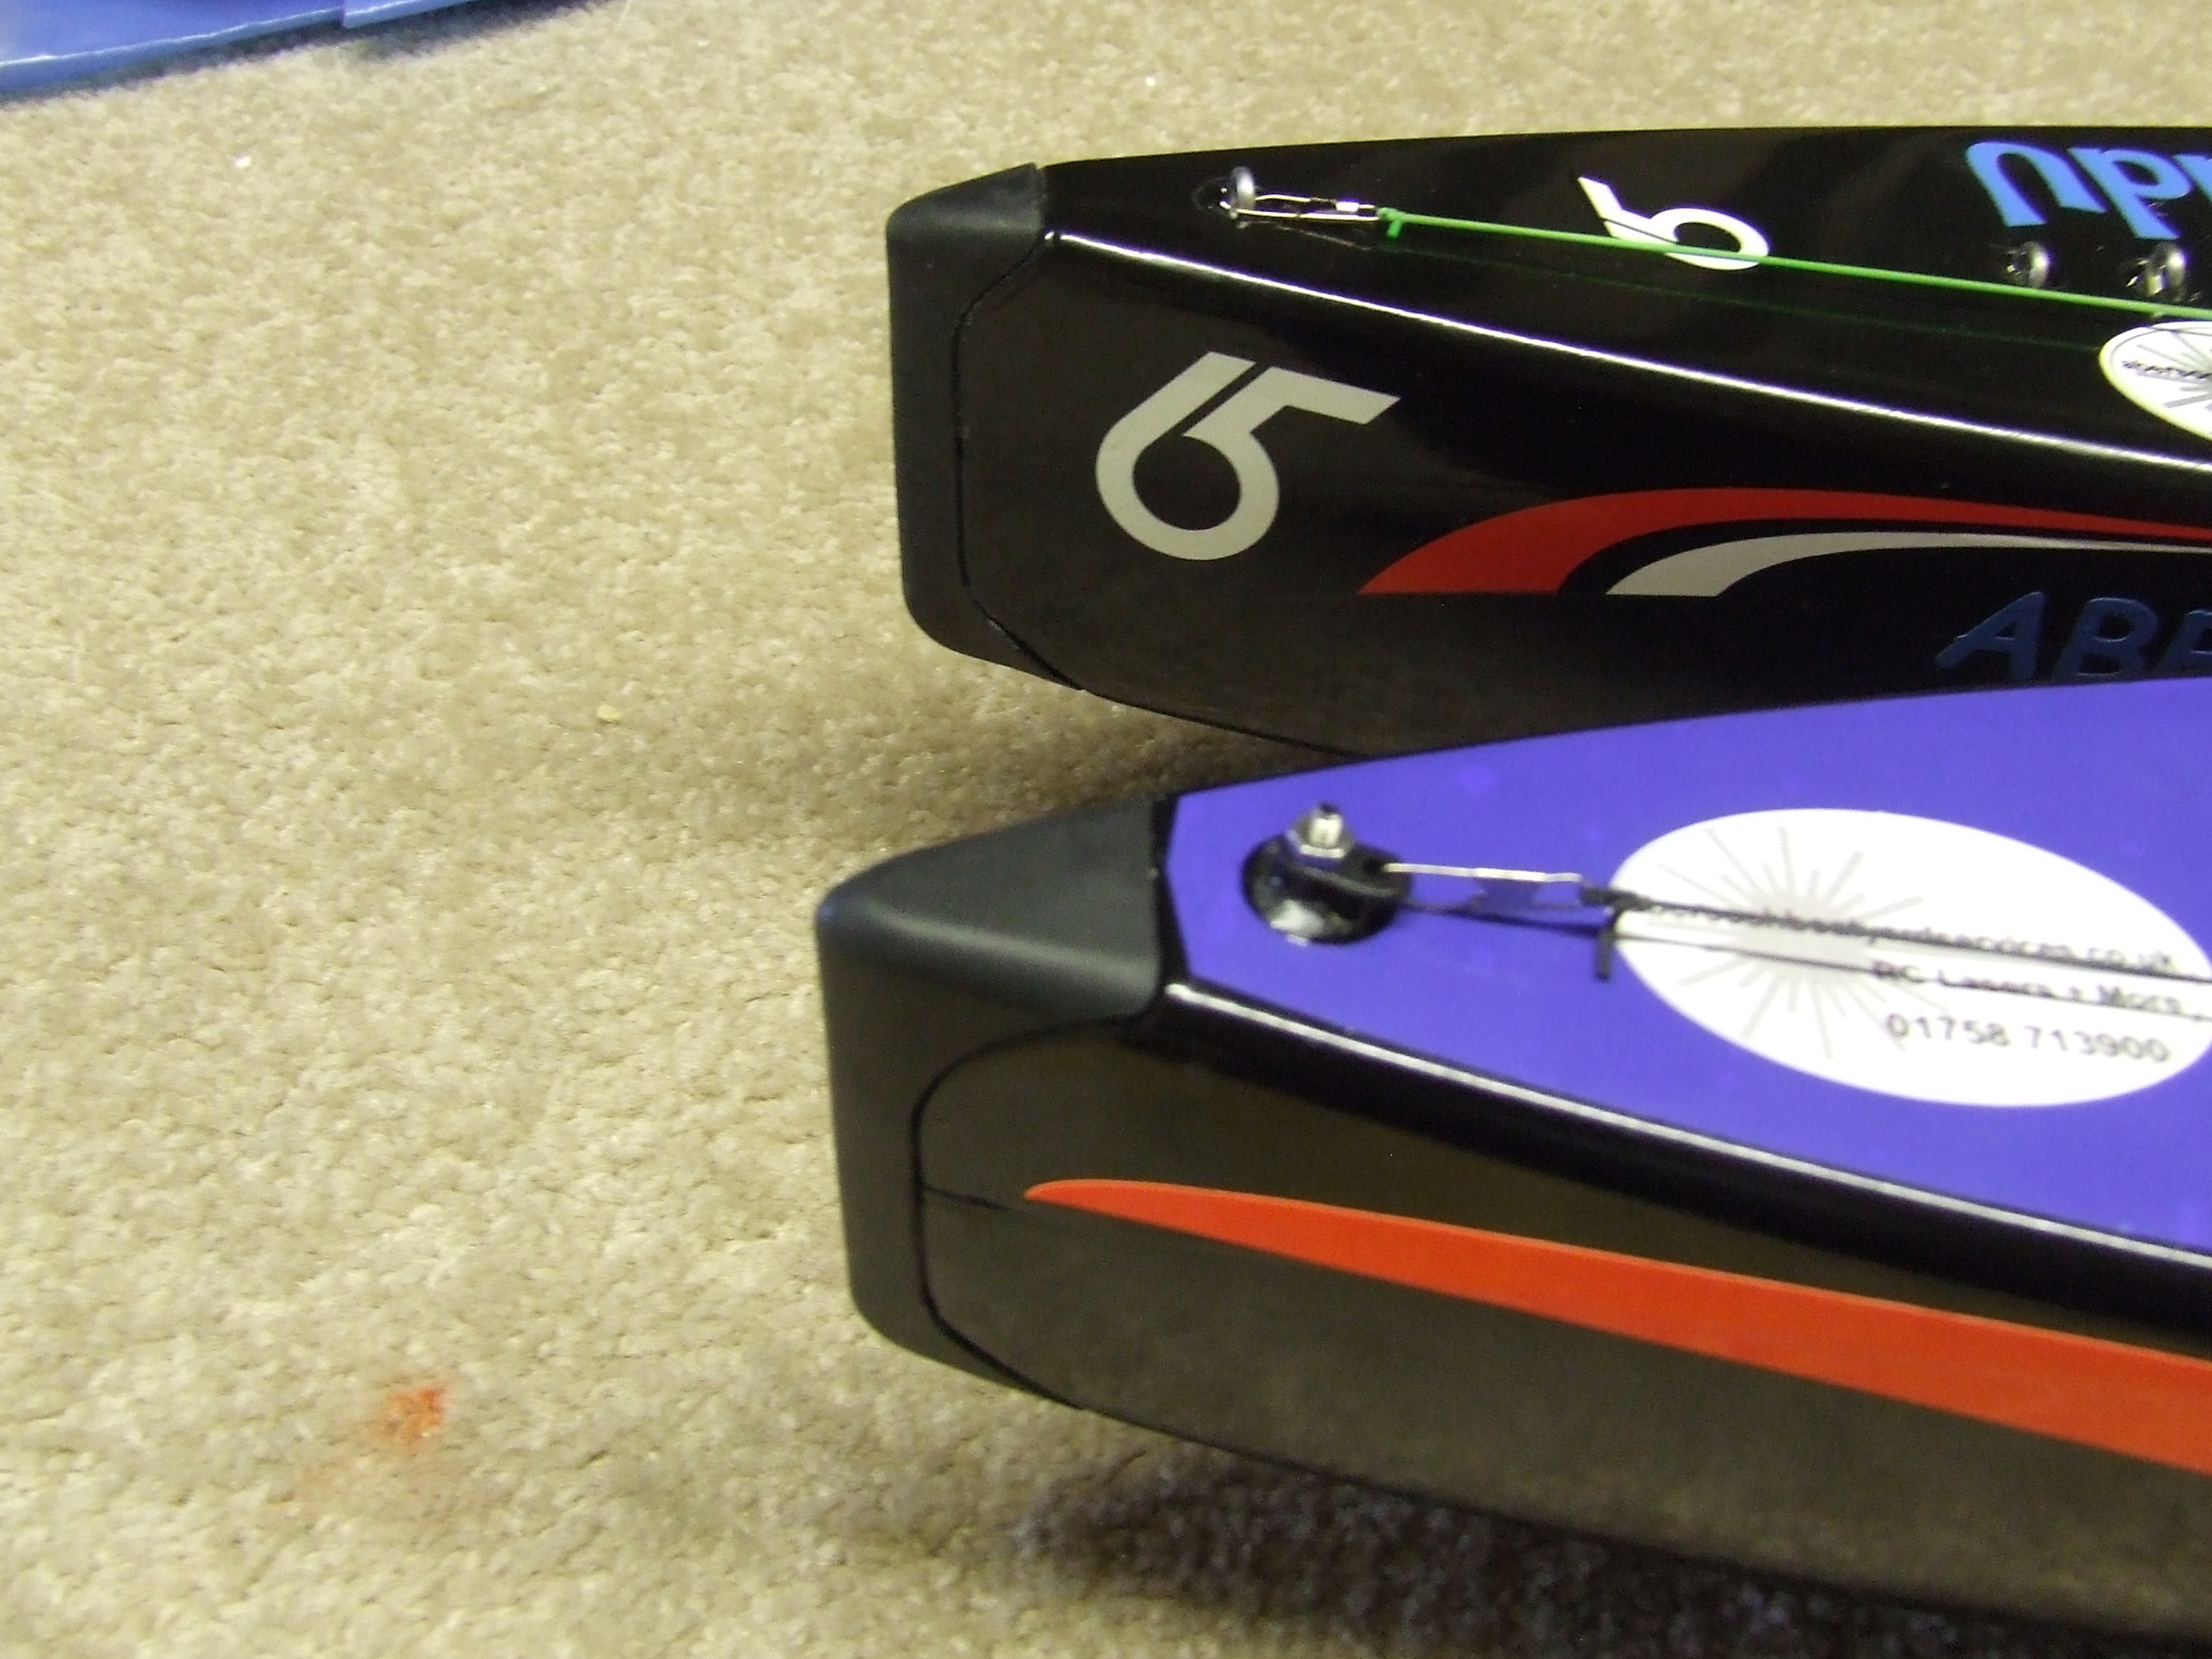
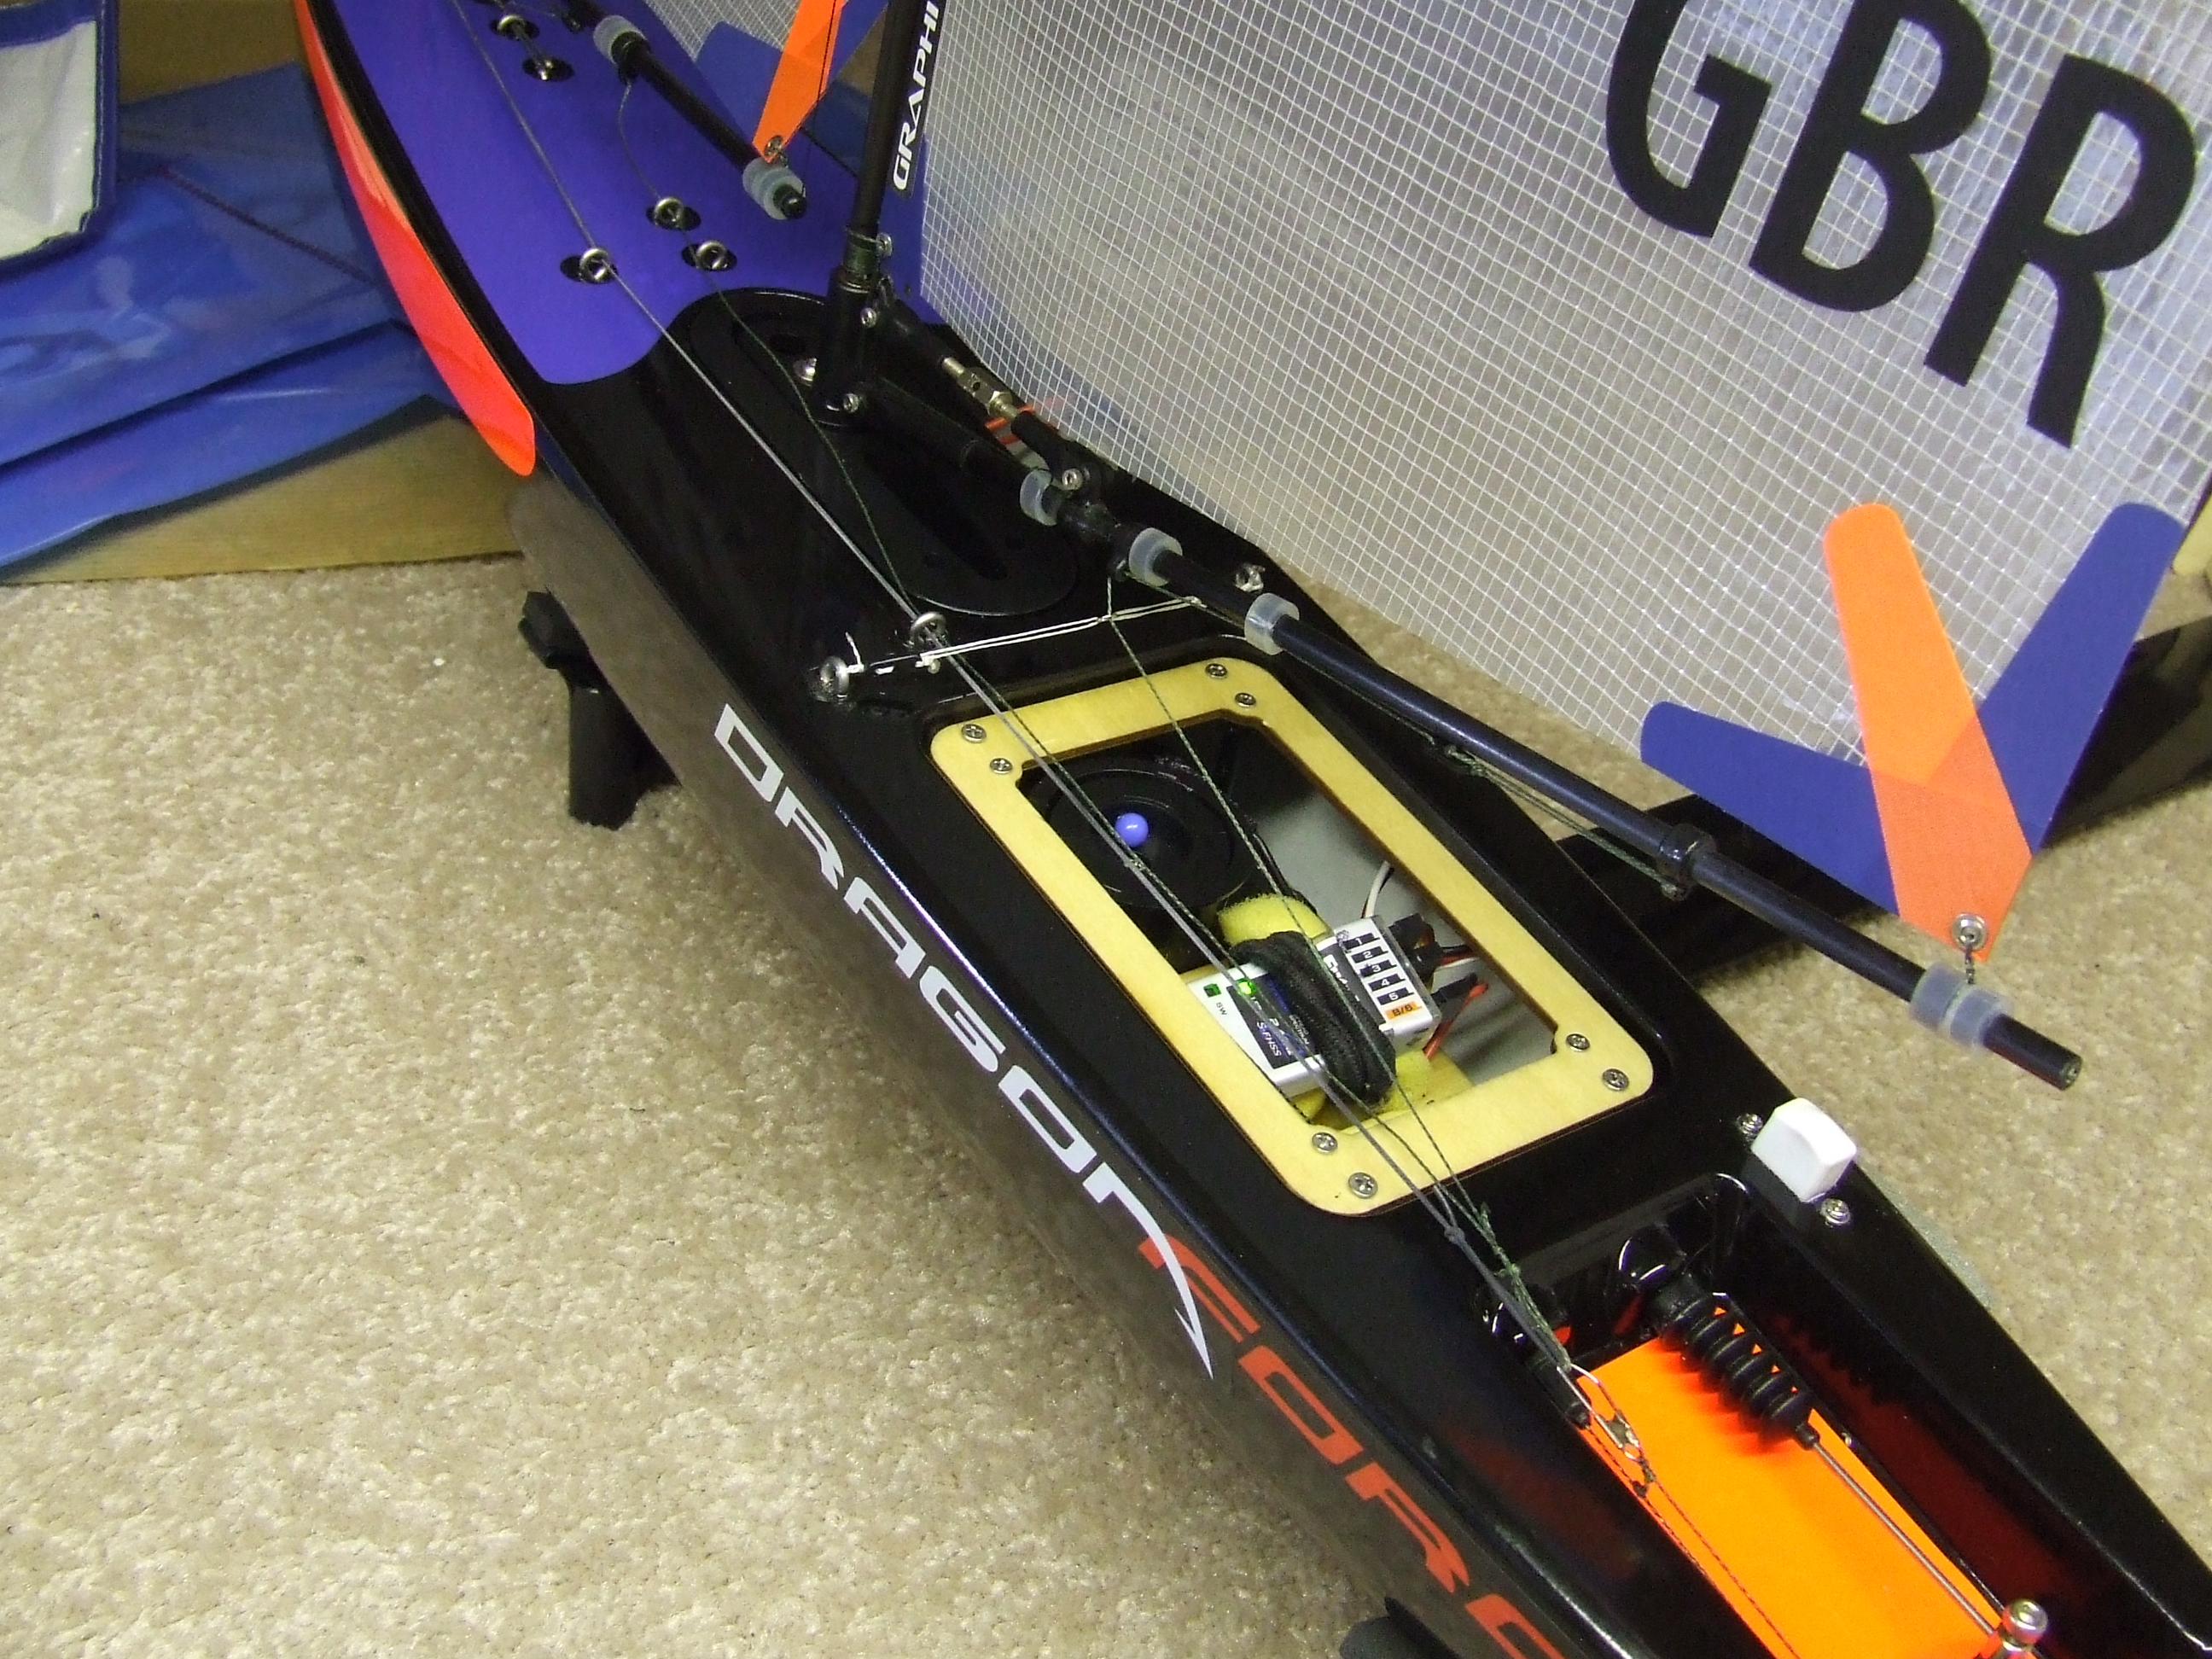
Bow Mod -If the bow fitting on your boat looks like the one in the background you need to keep reading and make this mod to your boat. If it looks like the boat with the blue deck then you can skip this mod.
Having taken your Dragon Force 65 out of its box you may have noticed that the foredeck area just behind the bow bumper is a little thin. The reason for this is the blow moulding process by which the boat is produced, the melted plastic is blown into the mould from the stern and flows through the mould to the front.
The amount of plastic has been carefully calculated and any more would be too much however it does leave us all with a bow section that could do with a bit of a mod.
Rather than waffling on we have made a short video which shows you how to do the mod quickly and cleanly, it is available on the media page.
Fin Mod – The DF65 fin is a hollow Aluminium extrusion which in early boats was open at both ends allowing the fin to gradually fill with water, no massive trauma however if you sail in salt or brackish water it isn’t ideal. The simple answer is to fill either end of the fin with some sealant. This mod does not need to be done on newer boats.
Deck Patch Mod – As you’ll notice the deck patches that are included with the kit are quite stiff, this makes them excellent as templates for making your own patches from your favourite deck patch material. Mine happens to be stealth grey so I cut a couple of patches out ready for use. When you first apply a patch you’ll immediately notice that the winch drum sits a little proud of the deck and has the potential to rub on the underside of the patch. No matter, just cut a suitable size of the scrap backing paper and sit it on top of the drum before you apply the patch. It will then stick to the underside of the patch all will be well! An alternative to this is to mount the winch servo from underneath the servo tray, this can be done when the servo tray is out for varnishing!
Newer boats are now coming through with a lower profile winch drum which sits much lower in the servo tray so there is no need to make this mod with later boats.
Section 4 – Modifications that should be done to boats manufactured after July 2013
None to date, however check your bow area and if it seems thin then make the mod suggested above.
Section 5 – Modifications that have been made to boats manufactured after June 2014
After a meeting with Joysway in Nuremburg in January there were a number of modifications that were requested and Joysway listened and reacted to these requests and the following mods were made for production boats supplied beyond July 2014.
- Wooden servo tray replaced with plastic item so no need to remove it and varnish!
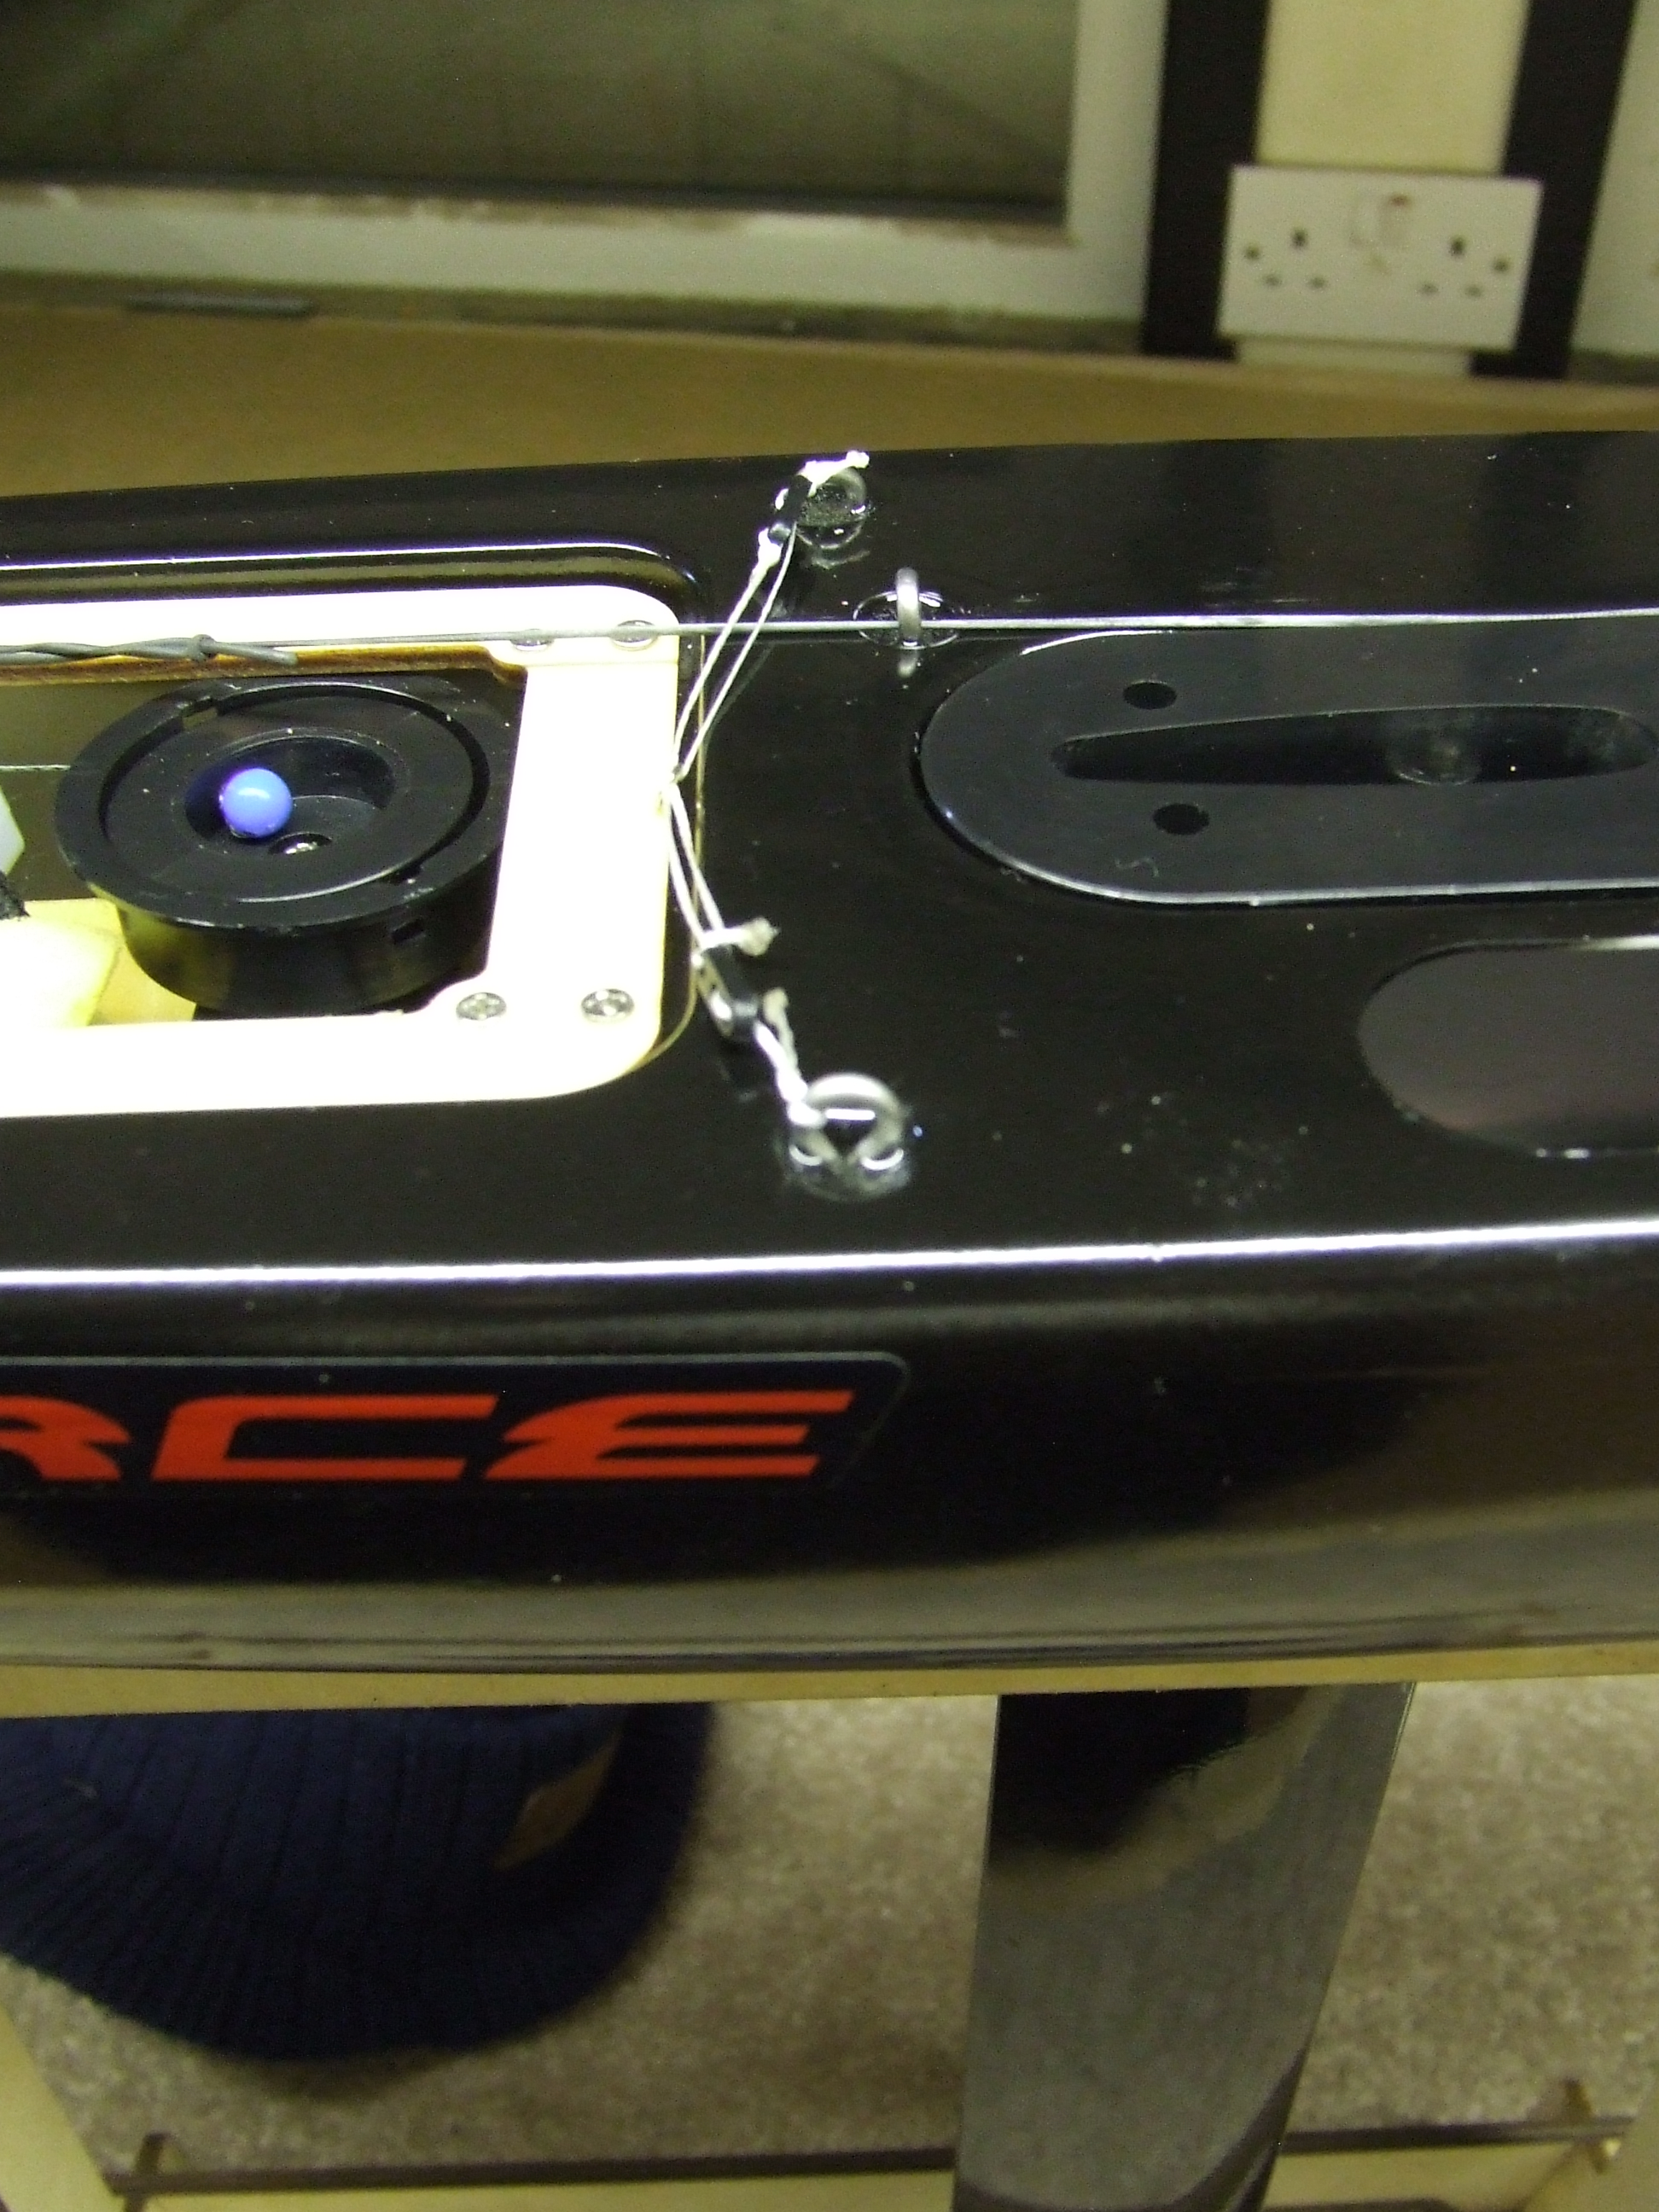
- Switch moved from starboard rear deck edge to transom well, eliminating possible switch off in a collision.
- Plastic compression strut replaced with all metal version making rig tweaks much easier, this item is available as a replacement on earlier boats.
- Metal rings have been placed at the ends of the carbon tubes to prevent splitting so no need to whip the tubes with cord.
- Deck eye for the jib swivel termination has been replaced with a post (screw) so no need to modify this into a hook!
- Main boom compression strut mount has been beefed up.
- Jib attachment fitting on mast has been beefed up.
Section 6 – Rigging Mods
This is an area that deserves quite a bit of your time when building the kit. Remember that the rig and sails are your engine and they need to be able to handle whatever the elements can throw at them.
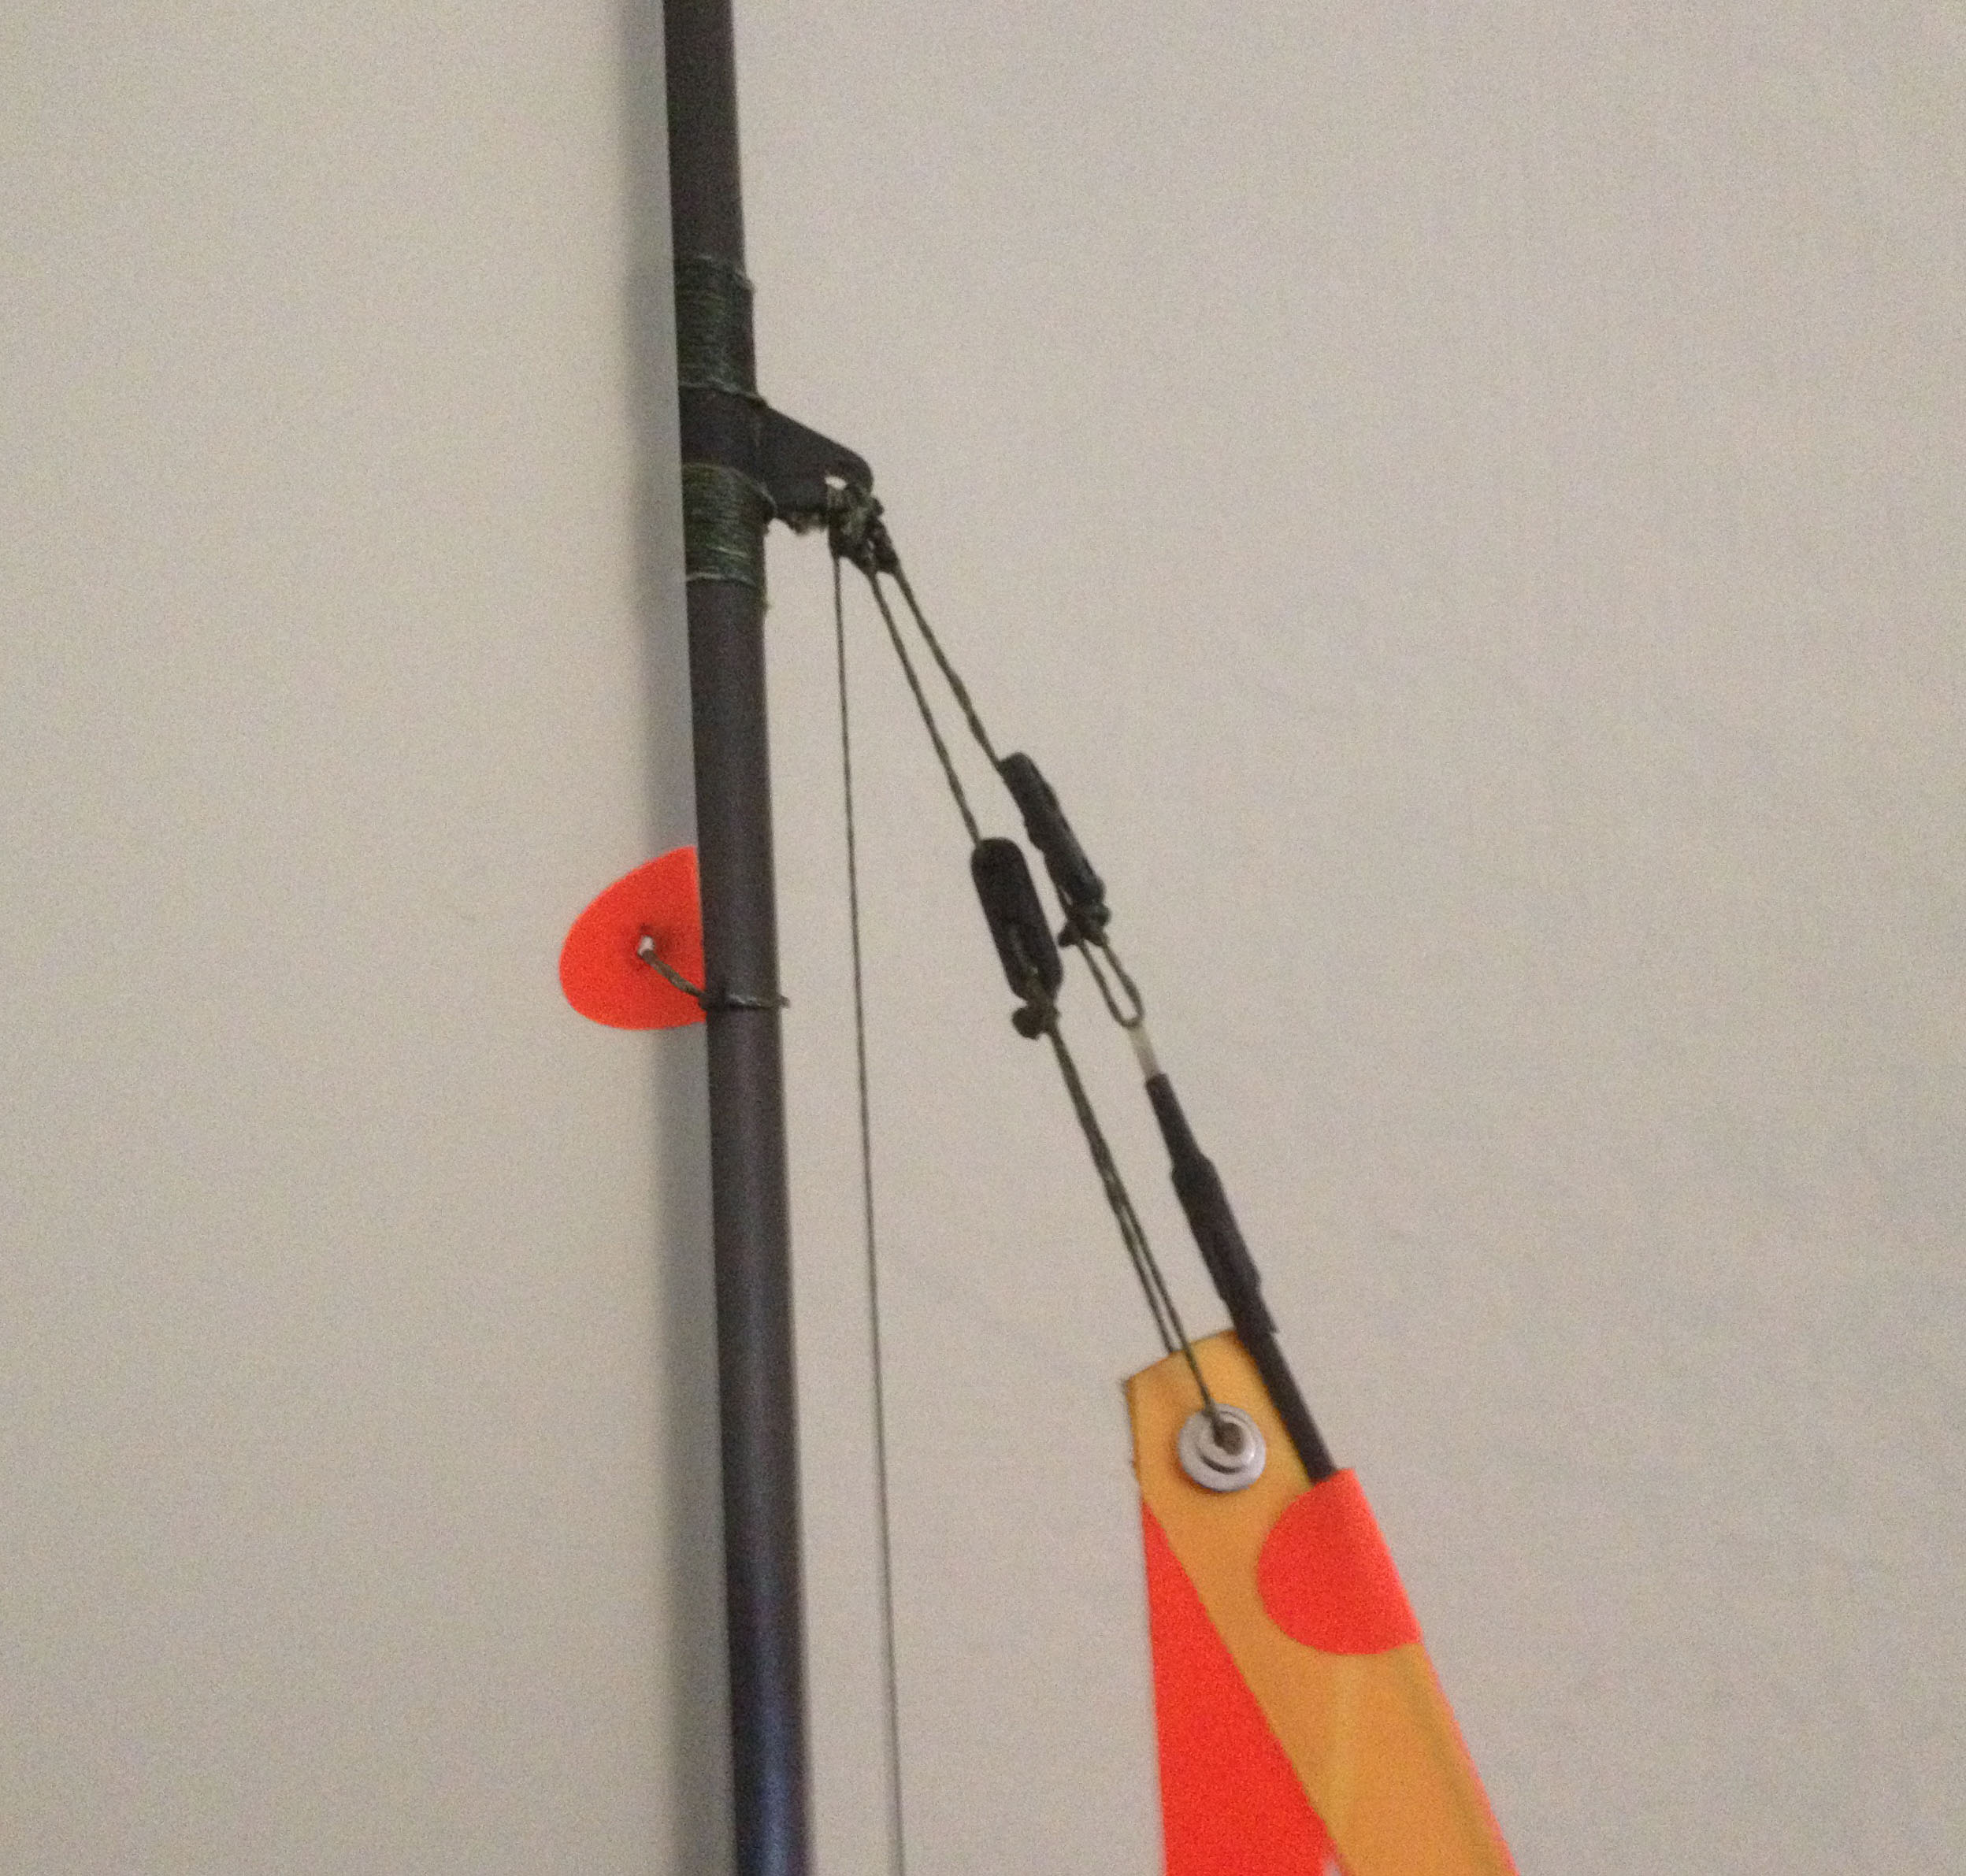
The main point when building your rigs is to make sure that you glue the carbon tubes together. Do a dry run and make sure that you get everything correctly aligned then mix up some epoxy and glue the whole assembly together. As you’ll see from the picture below I have also used some braid and wrapped the ends of the tubes, just above and below the jib fitting, this acts like a steel band on a barrel and stops the ends splitting under load. Once done you can forget about it but it will add to the longevity of your rig.
Compression Strut Mod 1 – When you unpack your new Dragon Force 65 yacht you’ll notice the very neat compression strut arrangement on the boom, there is one thing that needs modding and one item that you need to know about for the future.
The first is the boom band that connects the strut to the boom. It has been found that a couple of the bands have become loose when sailing which causes the sail to set as if there is no vang applied. To save this happening it is well worth mixing a little bit more 5 minute epoxy and winding some around the ends of the boom band. Two pictures below.
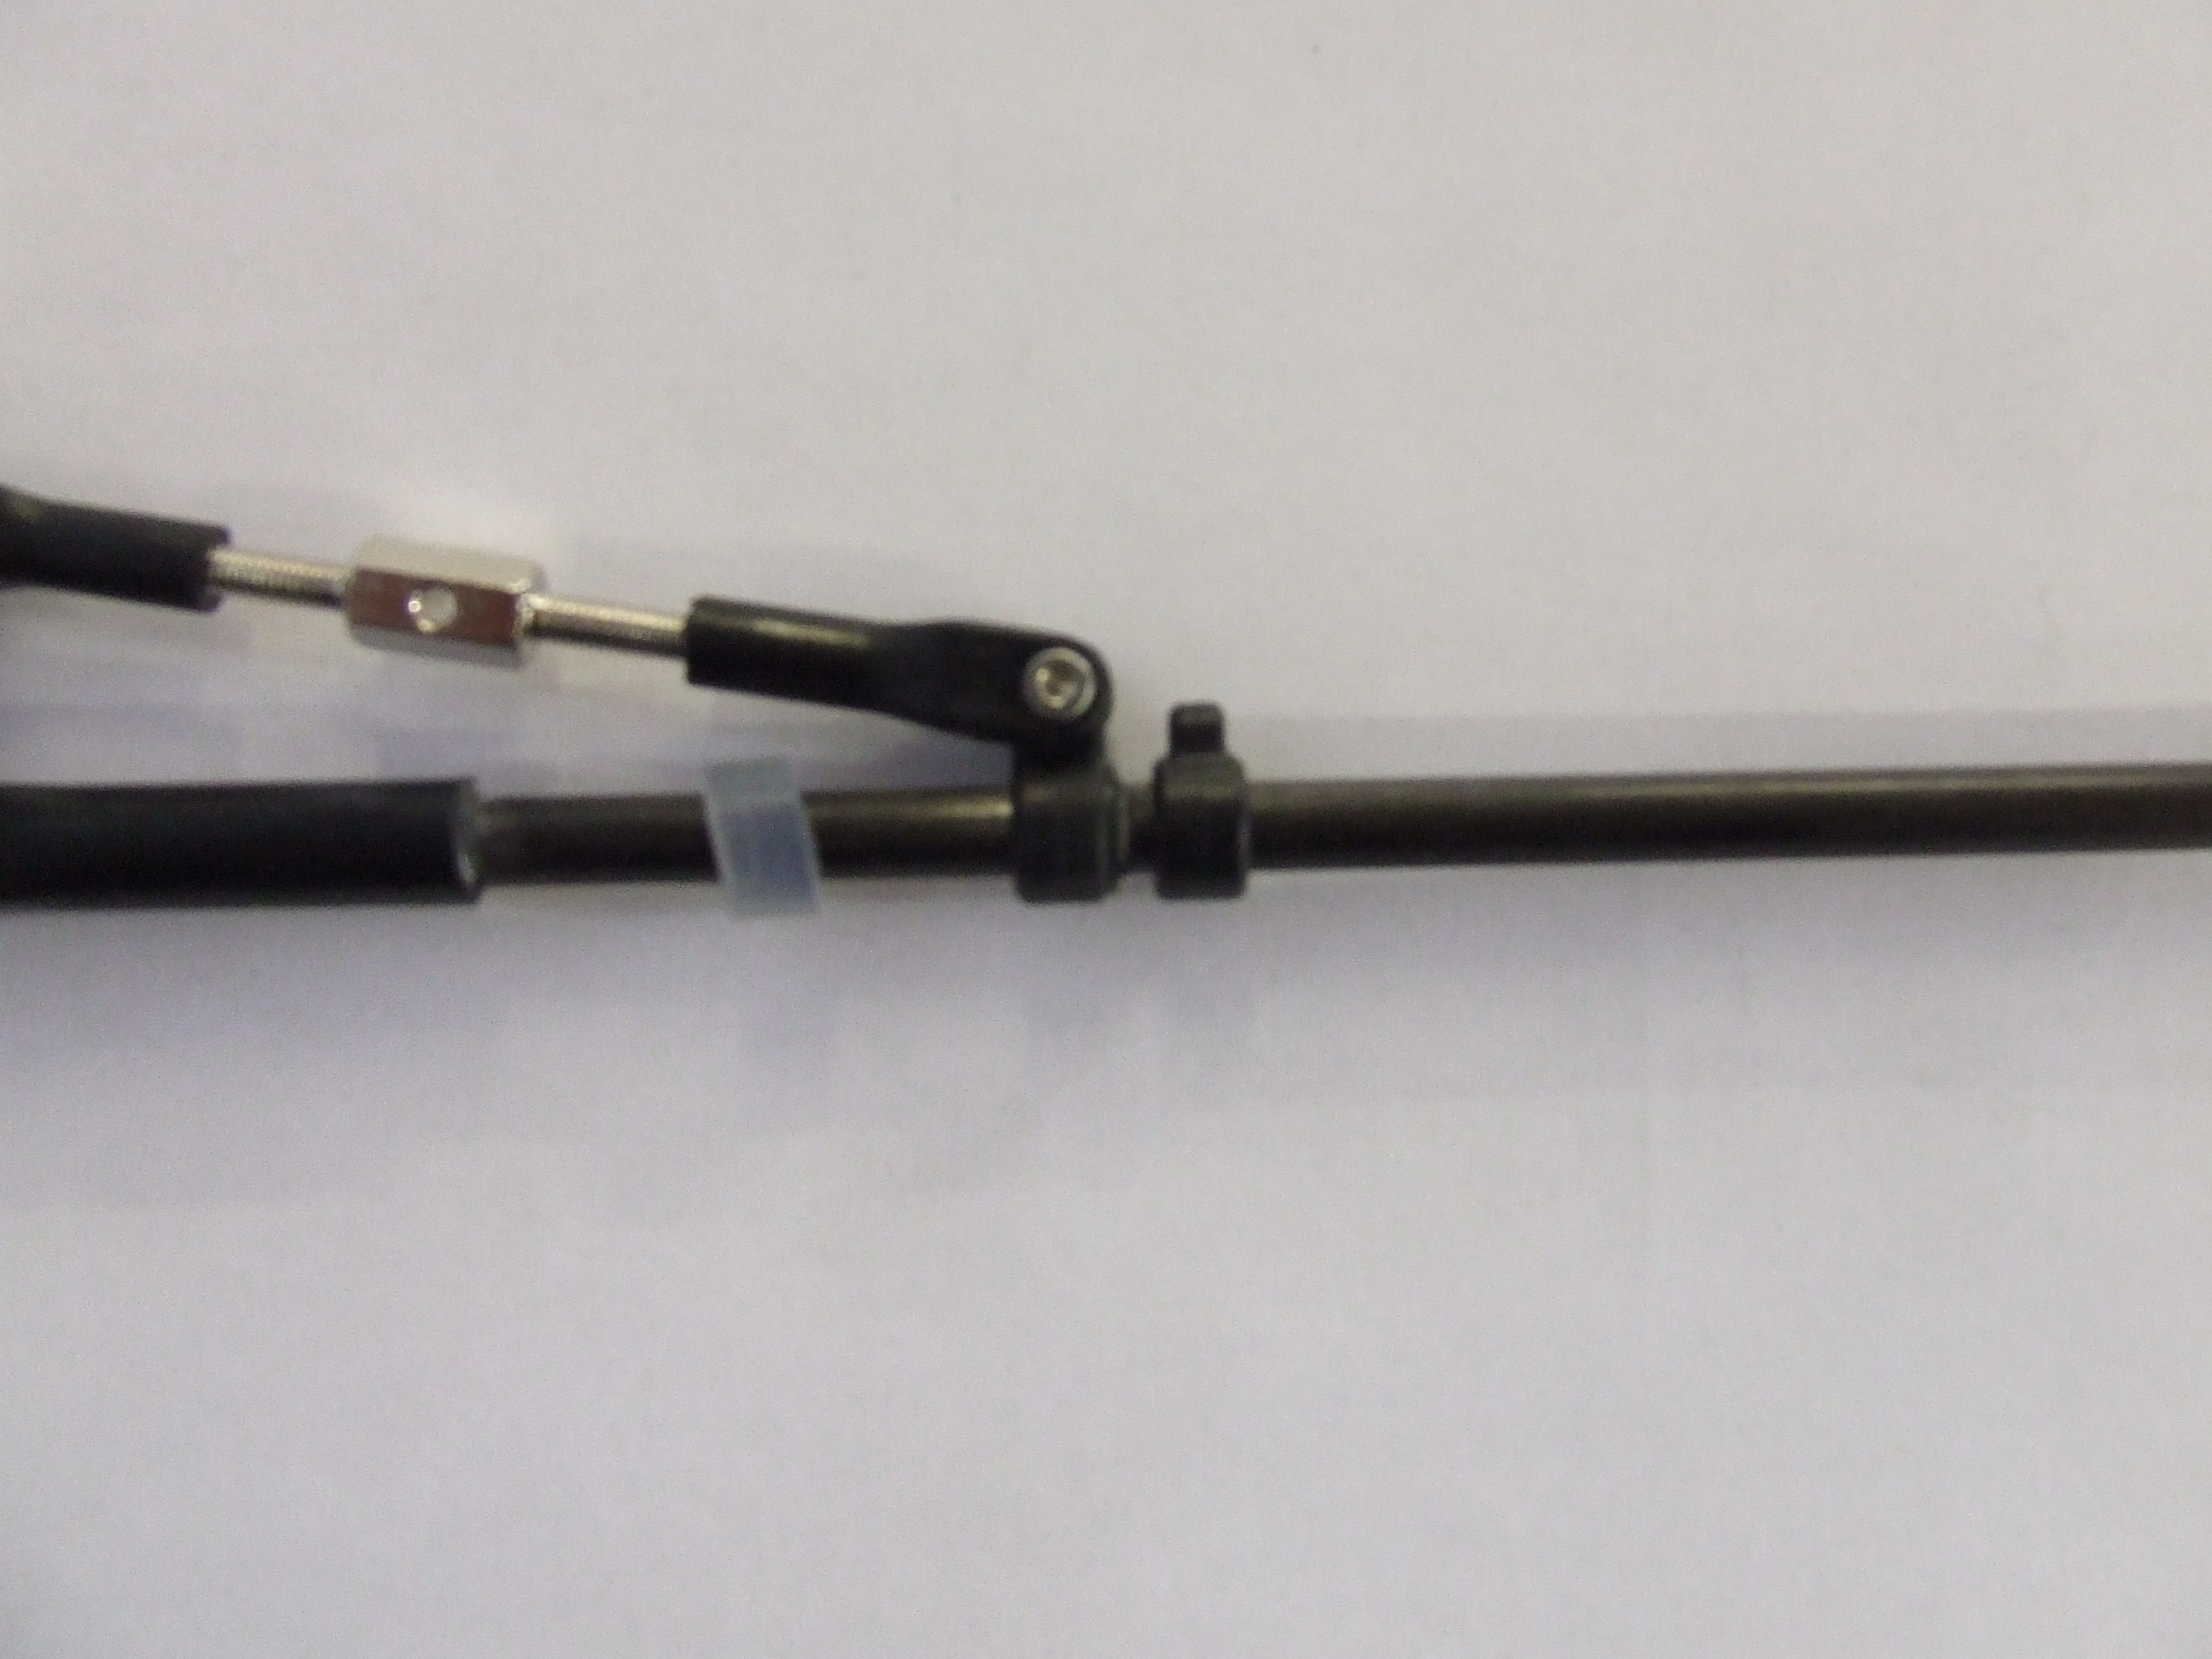
How it looks out of the box
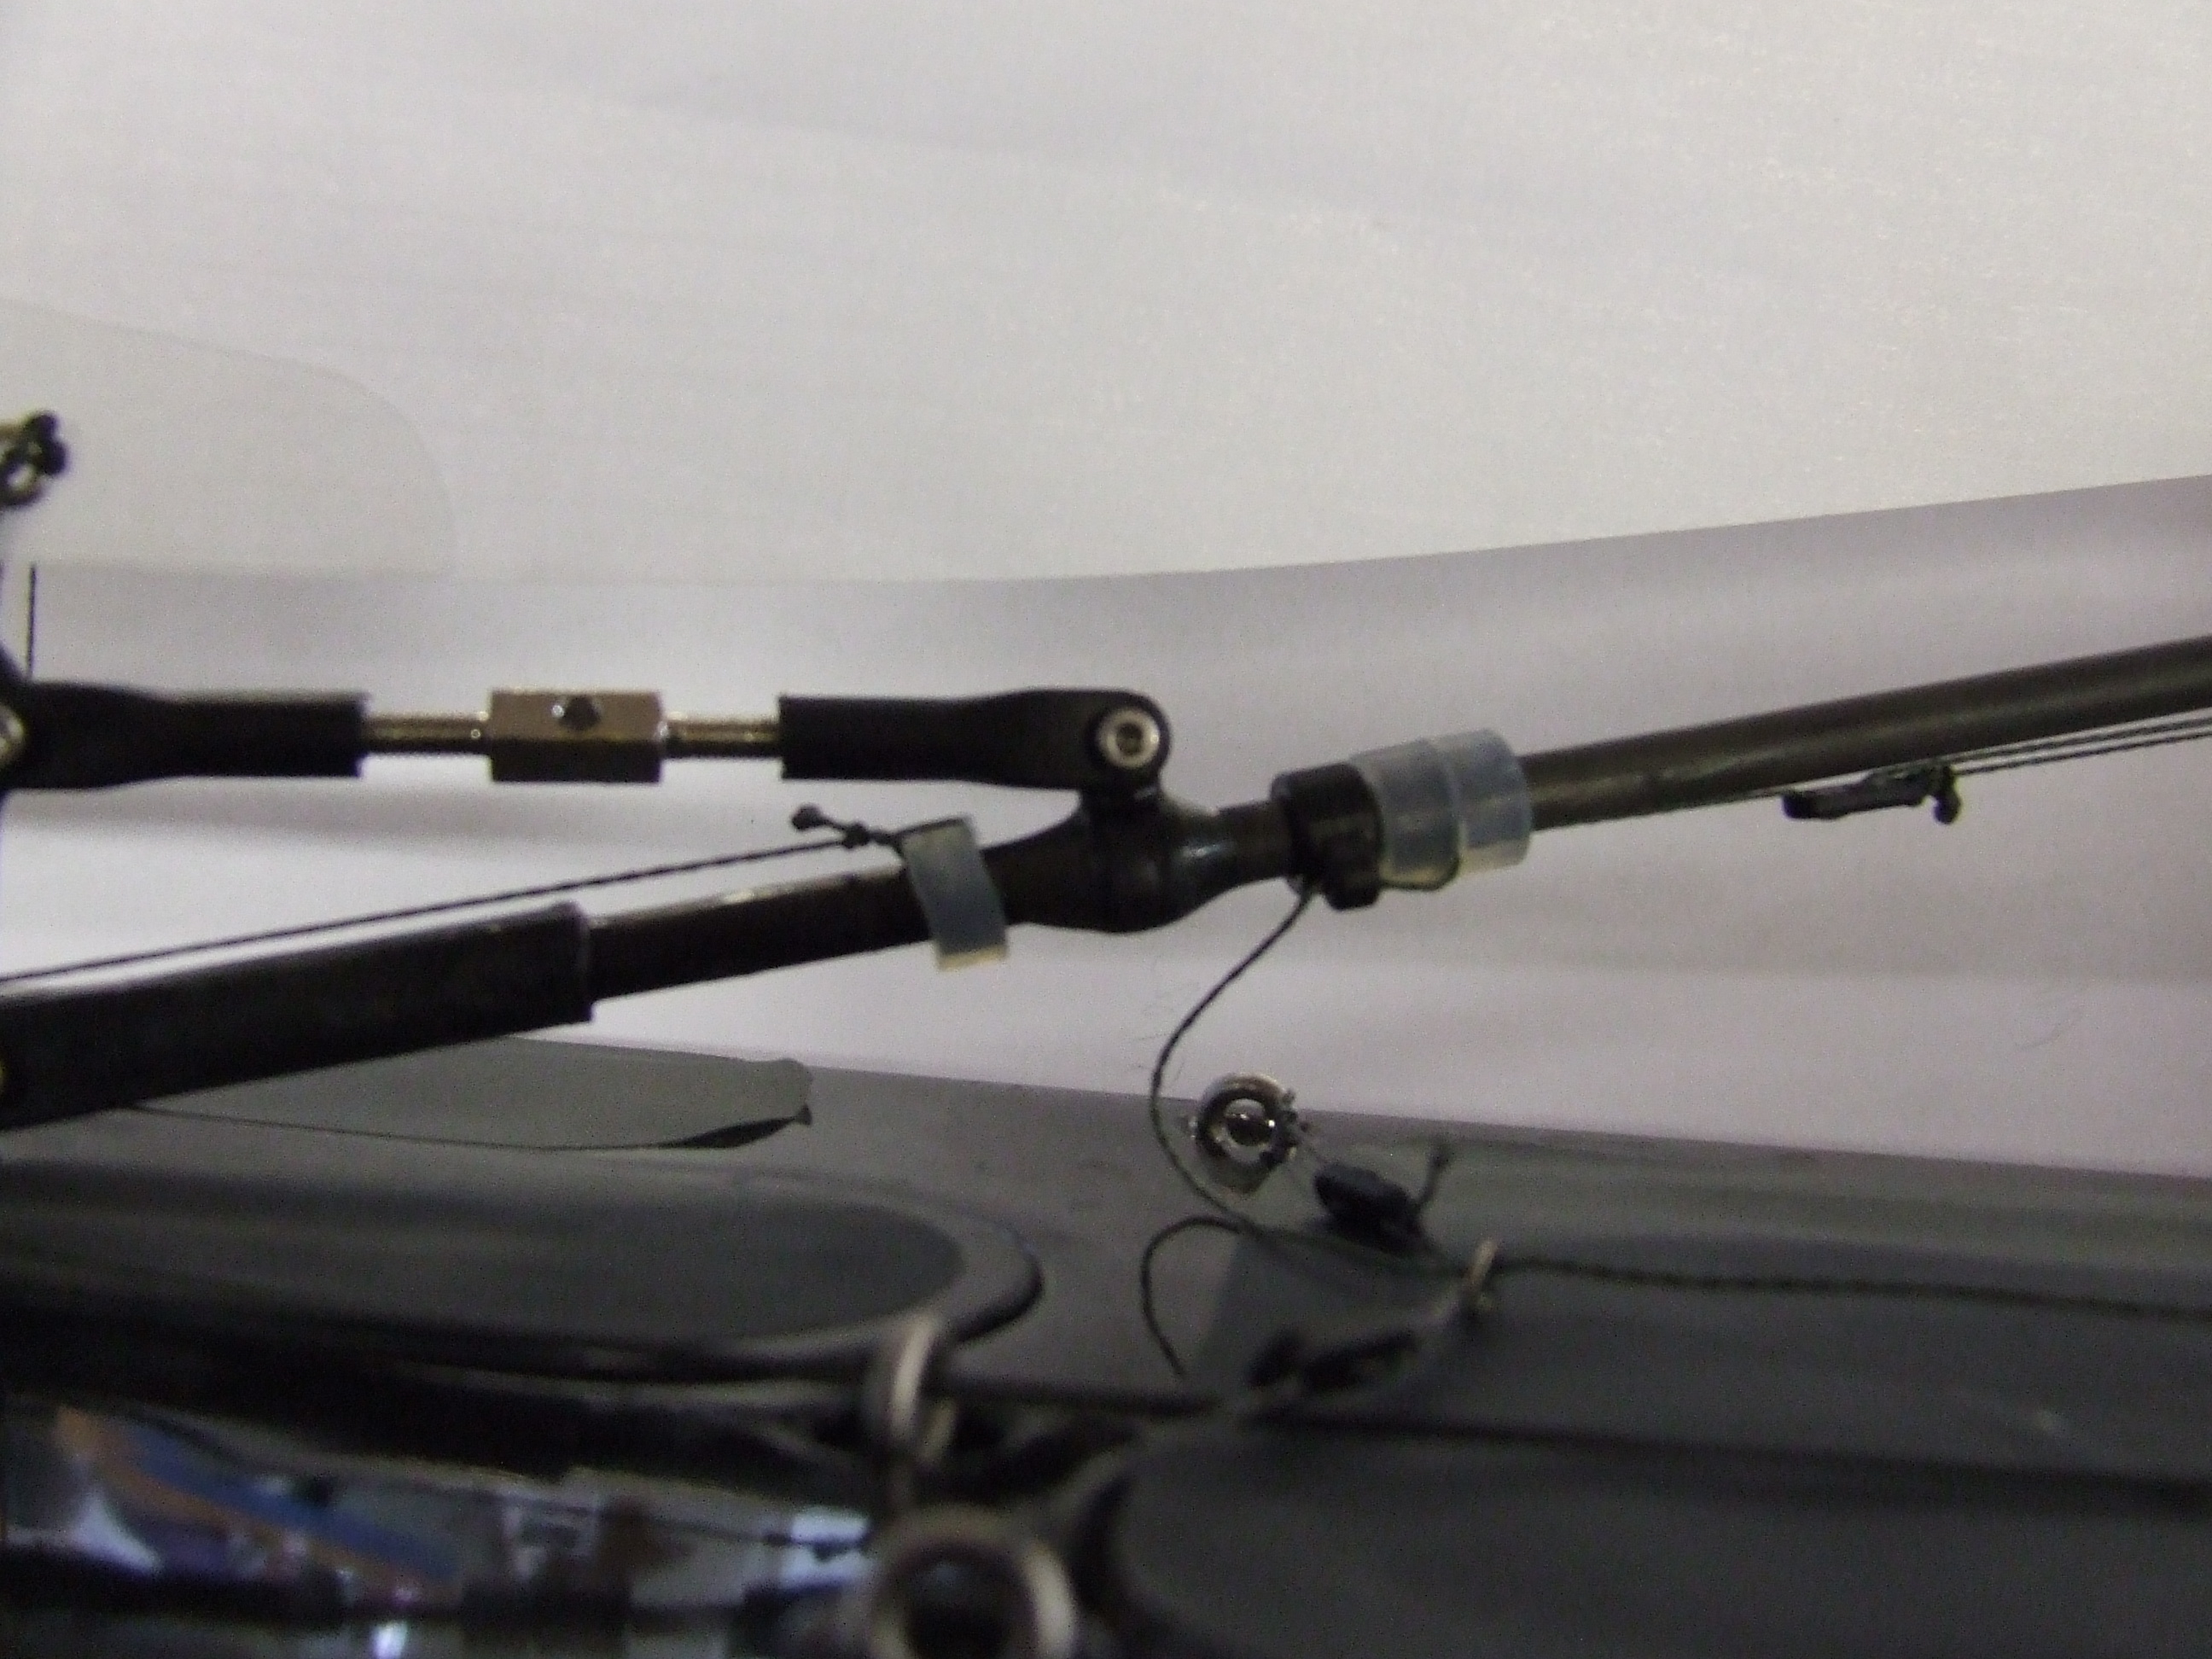
How it looks after modding
The second item on the boom arrangement that you need to know is that not all of the struts have been put on the same way around so if you decide to buy multiple rigs you might find yourself tightening one rig when you’d be loosening another. Nothing serious but something that you should perhaps know, and it is easy to fix too, just undo the retaining screws and turn the strut around.
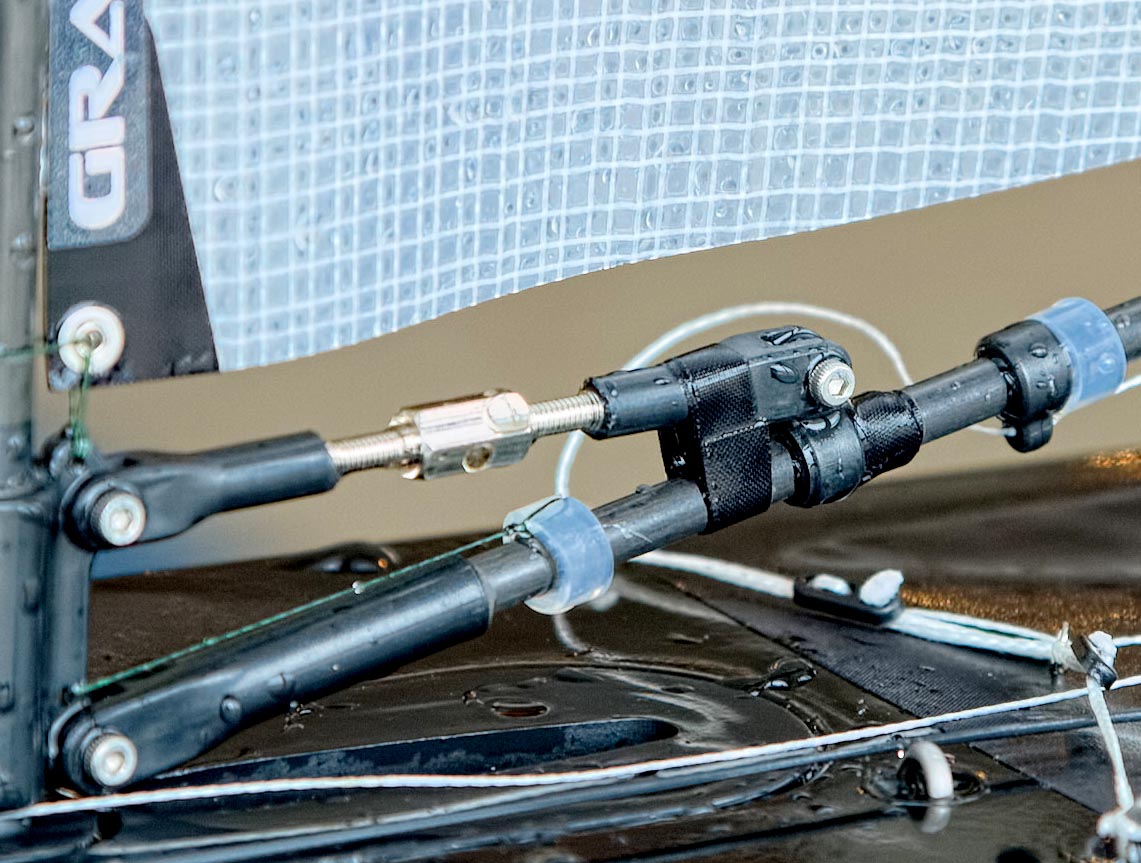
Compression Strut Mod 2 – Repair – Joysway are aware of the need to strengthen the boom band that the rear end of the kicker compression strut fixes to, and are working on a stronger fitting for future production. There are two issues with the current fitting:- the glue joint failing and the fitting sliding down the boom and the fitting breaking when adjusting stiff compression struts. So it is suggested, and therefore allowed in the rules, to either wrap tape, or bind with cord, around the boom immediately behind the fitting and also bind around the rear compression strut section and the boom as shown in the photo.
If an unreinforced fitting breaks during an event, glueing it back together with cyano glue (superglue) and binding as shown is an effective ‘get you back on the water’ repair.
Sheeting Mod – The instructions for the sheeting of both jib and mainsail were obviously written by someone who enjoys knitting as a hobby alongside radio sailing.
I have described the mod for the jib sheeting run earlier on this page, the mainsail sheeting run in the instructions suggests using deckeye 8 then to the bridle. Don’t bother running it through the eye just run it straight from the attachment point to the bridle, it makes for a more reliable run. Picture below.
Bowsies – The instruction manual suggests that you thread the cord through all three holes, through the fitting and then back to the bowsie. This makes it very hard to adjust so just thread the cord through the first two holes, through the fitting then back to the bowsie.
Backstay Crane – Some of these have been found to be not long enough for the mast head fitting which means that when the crane is inserted into the fitting it traps the sail head fitting and prevents it from rotating. When fitting the crane put a blob of glue into the masthead fitting and push the crane in but be careful not to glue the sail head fitting to the mast head fitting!
Mainsheet Ring – It has been noted that the original ring has frayed the mainsheet on some boats due it having sharp edges. It can be changed for an item of similar size, metal or plastic.
All of the above mods are class legal and can be done to any boat of any age. If you are have anything that you think should be added to this page please get in touch.
